
Few car problems feel as frustrating as turning the key and hearing nothing but a slow click or silence. A dead battery can happen to anyone, such as after leaving lights on, during cold weather, or when a battery simply reaches the end of its life. Knowing how to jump-start a car safely can turn a stressful moment into a manageable situation. With the right tools and a careful approach, most drivers can get back on the road in just a few minutes.
What Causes a Dead Car Battery in the First Place?
Car batteries lose power for several common reasons. Leaving headlights, interior lights, or accessories running while the engine is off can quickly drain the battery. Cold temperatures also reduce a battery’s ability to hold a charge, which is why many drivers experience battery trouble during the winter months. Older batteries naturally lose capacity over time as well.
Another frequent cause involves short trips that don’t allow the alternator enough time to recharge the battery fully. Corroded battery terminals or electrical issues may also prevent proper charging. When the battery no longer has enough power to start the engine, a jump-start provides temporary electricity from another vehicle so the engine can turn over and begin charging again.
What You Need Before Attempting a Jump-Start
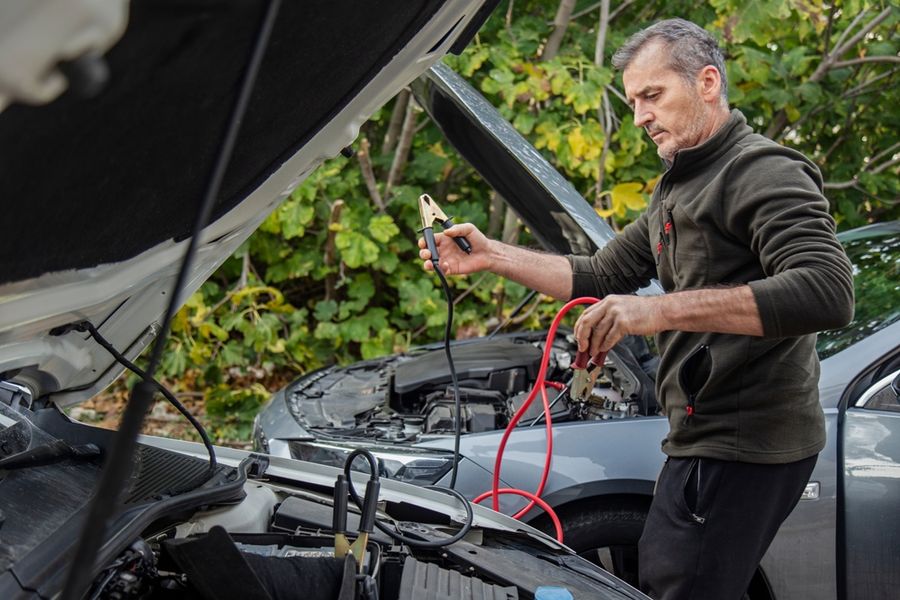
A successful jump-start requires only a few items, but having the right equipment is important. Jumper cables are the most common tool. Quality cables typically feature thick insulated wires and strong clamps that attach securely to battery terminals. Another vehicle with a working battery is also required unless you are using a portable jump starter.
Before connecting anything, both vehicles should be positioned close enough for the cables to reach. Cars can face each other or park side by side, depending on battery location. Both vehicles should be turned off with parking brakes engaged. Opening the hoods allows access to the batteries, which are usually located near the front of the engine bay, although some vehicles place them in the trunk.
Identifying the Battery Terminals
Car batteries have two main connection points known as terminals. One terminal is positive, marked with a plus sign, and often covered with a red cap. The other terminal is negative, marked with a minus sign. Correctly identifying each terminal is critical because jumper cables must connect in a specific order.
Sometimes battery terminals may be hidden beneath plastic covers or connected to remote posts designed specifically for jump-starting. If the battery is difficult to locate, the vehicle owner’s manual typically shows its location. Before attaching cables, inspect the terminals for corrosion, which may appear as a white or green powdery substance. Removing buildup with a brush or cloth helps ensure the clamps make good electrical contact.
Connecting Jumper Cables the Right Way
Correct cable order matters for safety and for protecting the vehicle’s electrical system. Jumper cables typically have red clamps for positive connections and black clamps for negative connections. Start by attaching the red clamp to the positive terminal of the dead battery.
Next, attach the other red clamp to the positive terminal of the working battery. Then connect a black clamp to the negative terminal of the working battery. The final black clamp should attach to an unpainted metal surface on the engine of the car with the dead battery rather than directly to the battery itself. This metal surface acts as a ground and helps reduce the chance of sparks forming near the battery.
Starting the Vehicles and Charging the Battery
Once all cables are securely attached, start the engine of the vehicle with the working battery first. Allow it to run for a minute so electricity begins flowing through the cables. After that, attempt to start the vehicle with the dead battery.
If the engine doesn’t start immediately, waiting a few minutes may allow the battery to gain enough charge. In some cases, slightly increasing the engine speed of the working vehicle can help deliver more electrical current. When the disabled vehicle starts successfully, leave the engine running. Keeping the engine on allows the alternator to recharge the battery so it can continue running after the cables are removed.
Disconnecting the Cables Safely
Removing jumper cables requires reversing the connection order used earlier. Start by removing the black clamp from the grounded metal surface on the vehicle that received the jump. Next, remove the black clamp from the working vehicle’s negative terminal.
After both black clamps are removed, disconnect the red clamp from the working battery. Finally, remove the red clamp from the previously dead battery. Keeping the removal sequence organized helps prevent sparks and protects sensitive electronic components in modern vehicles.
Once cables are removed, the newly started vehicle should continue running. Driving for at least twenty minutes helps recharge the battery through the alternator. If the battery dies again shortly afterward, it may indicate that the battery is aging or failing and may need replacement.
Staying Prepared for the Next Unexpected Battery Problem
Learning to jump-start a car provides a valuable skill that every driver benefits from having. A simple set of jumper cables stored in the trunk can turn a frustrating breakdown into a quick solution. Preparation often makes the biggest difference during unexpected car trouble.
Battery issues sometimes signal deeper problems, especially if the battery frequently loses charge. Regular vehicle maintenance and battery testing can help identify issues before they leave you stranded. With a little knowledge and the right tools on hand, a dead battery becomes far less intimidating and much easier to handle when it inevitably happens.